How to Restore Old Photos (Without a Photo Lab)
Updated July 7, 2026 · by Oguz Yildiz
To restore an old photo, you digitize it, repair the damage — scratches, fading, creases — and then optionally colorize and sharpen the result. Ten years ago that meant a photo lab or hours in Photoshop; today the whole pipeline runs on a phone in under a minute. This guide walks through the process end to end, what AI can realistically recover, and where a human touch still helps.
What photo restoration can (and cannot) recover
AI restoration reconstructs what damage obscured: it removes scratches and spots, rebuilds faded contrast, recovers facial detail, and fills small missing areas with plausible content. What it cannot do is conjure information that was never captured — a face that is a white blur in the original will come back plausible, not photographically exact. The practical rule: the more of the subject that survives, the more faithful the restoration. For precious photos, keep the original scan untouched and treat every restoration as a new copy.
Step 1: Digitize the print properly
Restoration quality is capped by scan quality. Shoot the print flat, in bright indirect light (next to a window, not under a lamp), with the phone parallel to the photo to avoid glare and distortion. Fill the frame. If the photo lives behind album plastic, take it out if you safely can. Refect’s built-in scan camera handles the cropping and perspective for you — and our digitizing guide covers batch-scanning a whole shoebox.
Step 2: Run the restoration
- Import the scan into Refect (or scan directly in-app) and choose RESTORE.
- Let the one-tap pass work. The AI erases scratches, spots, and creases, rebuilds fading, and refines faces — up to 30 faces in a group shot, each treated separately.
- Compare Before/After. Drag the slider and check the areas you care about most, usually faces and hands.
- Fine-tune. Intensity sliders control how strong the restoration is; the manual retouch brush handles any spot the automatic pass treated too lightly or too aggressively.
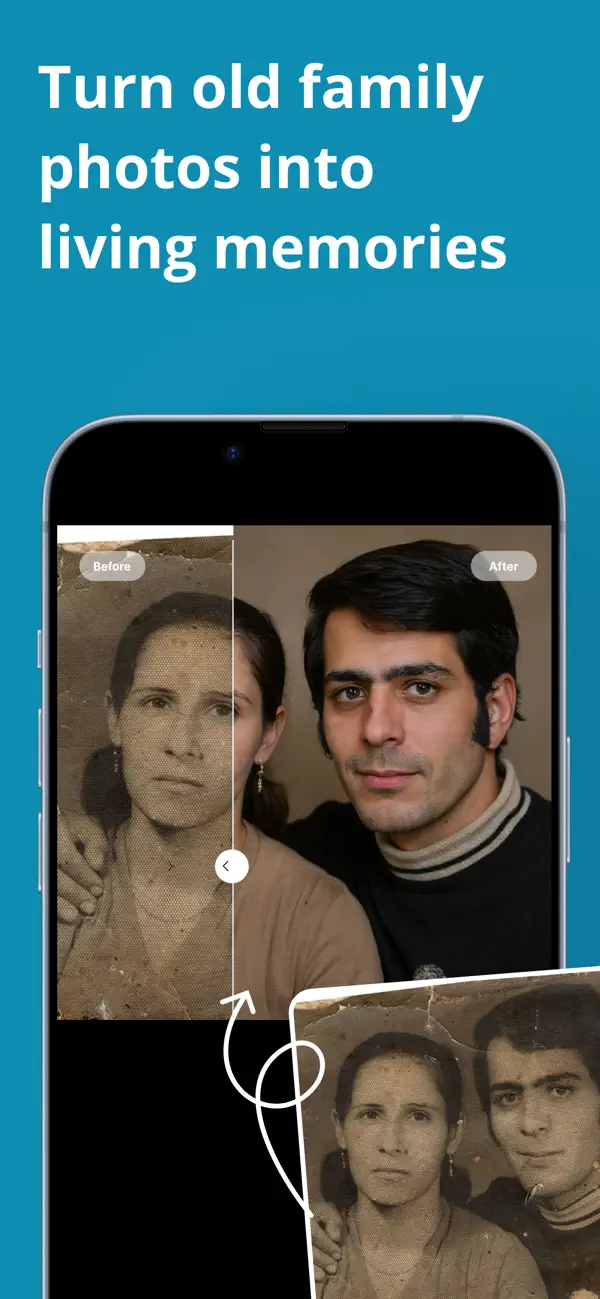
Step 3: Colorize and enhance (optional)
With the damage repaired, two more passes can transform the result. COLORIZE converts black-and-white to realistic color — see how colorization works for what to expect. ENHANCE sharpens soft focus and upscales up to 8×, which matters if you plan to print the restored photo larger than the original. Order matters: restore first, colorize second, enhance last.
Step 4: Export and archive
Save the restored image in full resolution — Refect exports JPEG and HEIF for sharing, plus lossless PNG/TIFF for archiving. A sensible family-archive setup: one folder of raw scans, one of restorations, both backed up. Since Refect runs entirely on-device, nothing was uploaded anywhere in this process — worth knowing when the photos are of your grandparents.
Related questions
How much does it cost to restore old photos?
Professional restoration services typically charge per photo, with complex damage priced higher. App-based restoration inverts the economics: Refect is free to download and uses credits per restoration, which makes a 200-photo shoebox feasible in a way per-photo lab pricing never was.
Can I restore a photo of a photo?
Yes — that is exactly what scanning with your phone is. Quality depends on the shot: flat print, even light, no glare. The restoration pass cleans up most of the capture imperfections along with the original damage.
What about torn or water-damaged prints?
Physical damage has its own playbook — including Refect’s Magic Merge, which rebuilds one complete image from two damaged copies. Our guide on repairing damaged photos covers water stains, tears, and scratches in depth.